How to schedule appointments and to-do tasks in a Linux terminal
Last updated on August 22, 2020 by Gabriel Cánepa
If you are a Linux system administrator who enjoys spending your time in terminal-land, but also needs a way to stay on top of your everyday tasks, appointments and meetings, you will find calcurse to be a very useful tool. calcurse combines a calendar, a to-do list manager, a scheduler and a configurable notification system into one piece of software with a nice ncurses-based interface. At the same time, it does not confine you in a terminal, but also allows you to export your calendars and notes into other printer-friendly formats.
In this article we will explore how to install calcurse on Linux, and teach you how to take advantage of some of its incredible features.
Instaling calcurse on Linux
calcurse is available in standard repositories of most Linux distributions. In case calcurse is not available on your distribution (like in CentOS/RHEL), you can build it from the source easily once you have gcc and ncurses development files installed.
For Debian, Ubuntu or Linux Mint:
# aptitude install calcurse
For Fedora:
# yum install calcurse
For CentOS or RHEL:
# yum install gcc ncurses-devel
# wget http://calcurse.org/files/calcurse-3.2.1.tar.gz
# tar xvfvz calcurse-3.2.1.tar.gz
# cd calcurse-3.2.1
# ./configure
# make
# make install
Launching calcurse
Once the installation is complete, you can launch calcurse as a normal user by simply running:
$ calcurse
You will be presented with the following empty interface. If the color scheme does not seem appealing to you, you will be able to change it later.
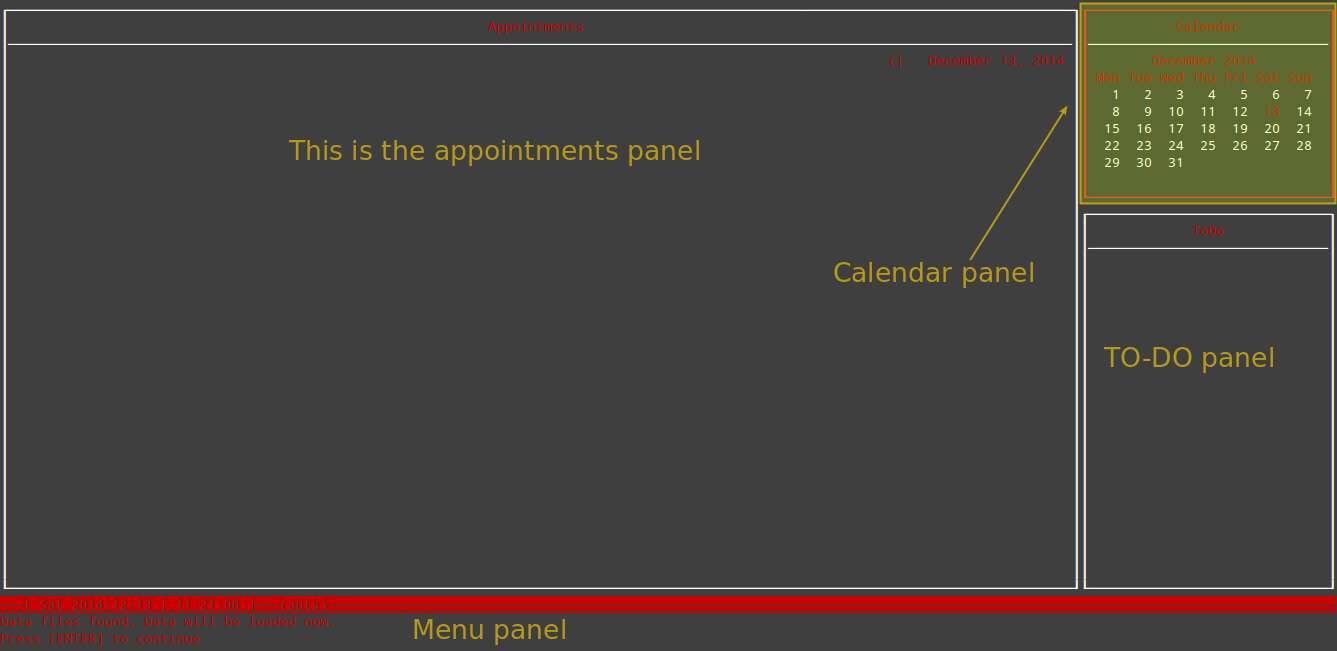
We will exit the main interface for now by pressing ENTER, q, ENTER again, and y. This sequence activates the main menu at the bottom of the interface, tells calcurse to quit, saves our currently opened notes, and finally confirm about exit.
When we run calcurse for the first time, the following directory structure is created in our home directory:
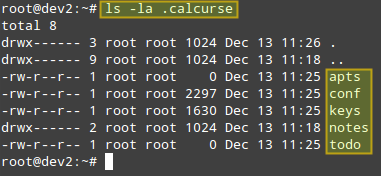
Here is a brief description of each item:
- The
aptsfile contains all of the user's appointments and events, while thetodofile contains the todo list. - The
conffile, as you probably already guessed, contains the current user's individual settings for his/hercalcurseenvironment. - The
keysfile contains the key bindings that the user has defined (e.g.,qorQto quit,xorXto export contents, and so forth). - In the
notessubdirectory you will find text files containing description of notes that you can attach to each scheduled item.
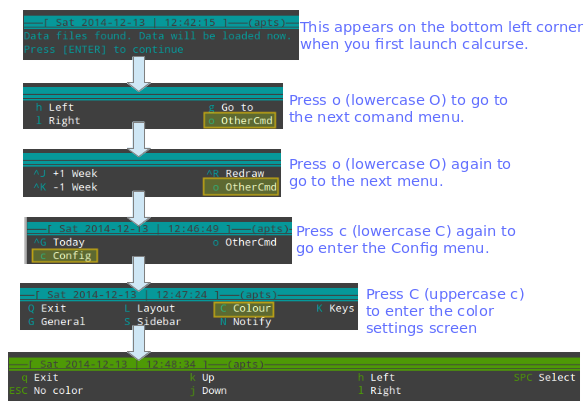
Changing the Color Scheme
To change the color scheme for calcurse, follow these steps:
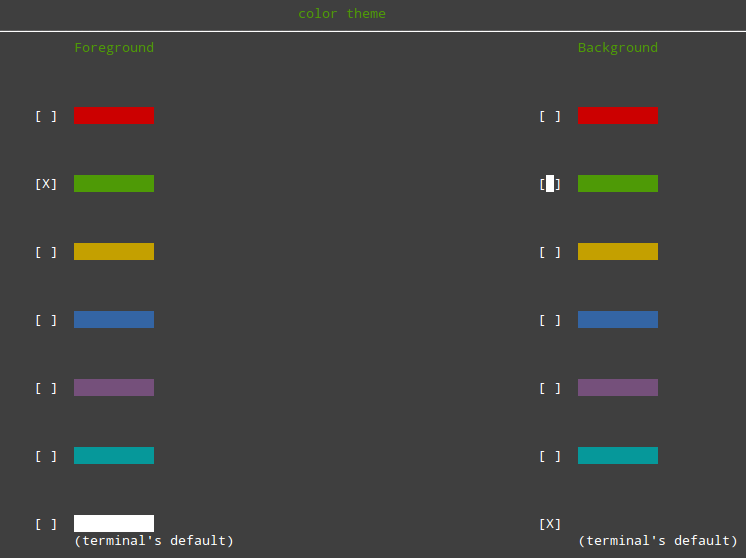
Use the key bindings in the last image to select a foreground and background configuration that better suits your needs:
Adding Appointments and To-do Tasks
While navigating the command menus in the previous section, we saw that pressing the letter o takes us from one menu to the next one. We can think of the second menu as the schedule edit menu:

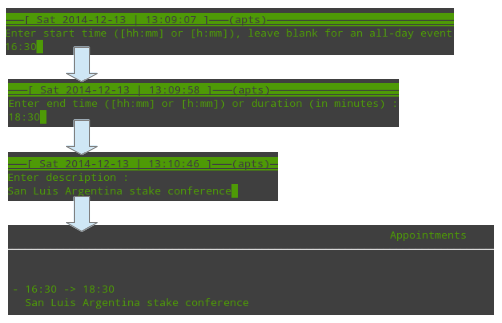
Thus, we will add a new appointment for today and a new to-do task with the Ctrl+A and Ctrl+T key combinations, respectively. If we want to add an appointment for a date other than today, we can navigate the calendar using the Ctrl+L (+1 day), Ctrl+H (-1 day), Ctrl+J (+1 week), and Ctrl+K (-1 week) key combinations before adding an appointment or to-do task:
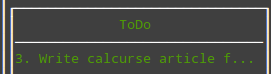
The necessary steps to add a to-do task are similar, only starting with Ctrl+T, as explained earlier:

You will then be asked to enter a priority number, and the to-do task will be added to the main screen:
You can now verify that the to-do task and the appointment have been saved in the todo and apts files, respectively, under .calcurse:

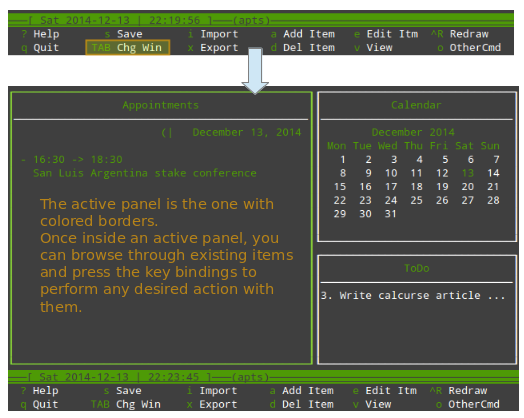
Note that you can edit those files either through your favorite text editor or using the menu in the bottom of the calcurse screen. You can switch between panels by pressing the Tab key, and then choose the item you wish to edit:
Setting up Notifications for Events
You can configure notifications via the Notify menu. To do so, follow the same steps as in the case of changing the color scheme, but choosing Notify instead of Colour:
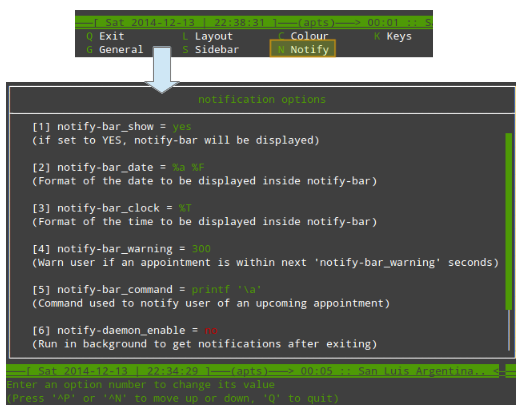
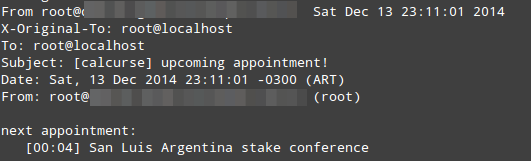
Suppose you want to set up email notifications. Press the number 5 to edit the value of the notify-bar_command as follows:

With the settings outlined above, root@localhost will receive an email notification 300 seconds (or 5 minutes) before the next scheduled task if such task is flagged as important. If you wish to enable this functionality even when calcurse is not running, change the value of notify-daemon_enable to yes. In the current example, dev2 is the localhost's hostname.
Please note that for the sake of demonstration purposes, I have changed the start and/or end time of the original appointment as needed during each step of this tutorial.
Conclusion
In this article we have shown how to set up a versatile scheduler and reminder to help you organize your daily activities and to plan ahead of important events. You may also want to check calcurse's PDF manual, but feel free to drop me a line using the comment form below if you have any questions. Your comments are always more than welcome and I'll be glad to hear from you!
Support Xmodulo
This website is made possible by minimal ads and your gracious donation via PayPal or credit card
Please note that this article is published by Xmodulo.com under a Creative Commons Attribution-ShareAlike 3.0 Unported License. If you would like to use the whole or any part of this article, you need to cite this web page at Xmodulo.com as the original source.

Xmodulo © 2021 ‒ About ‒ Write for Us ‒ Feed ‒ Powered by DigitalOcean