How to remove unused old kernel images on Ubuntu
Last updated on October 13, 2020 by Dan Nanni
In Ubuntu environment, there are several ways for the kernel to get upgraded. On Ubuntu desktop, Software Updater allows you to check for and update to the latest kernel on a daily basis. On Ubuntu server, the unattended-upgrades package takes care of upgrading the kernel automatically as part of important security updates. Otherwise, you can manually upgrade the kernel using apt-get or aptitude command.
Over time, this ongoing kernel upgrade will leave you with a number of unused old kernel images accumulated on your system, wasting disk space. Each kernel image and associated modules/header files occupy 200-400MB of disk space, and so wasted space from unused kernel images will quickly add up.
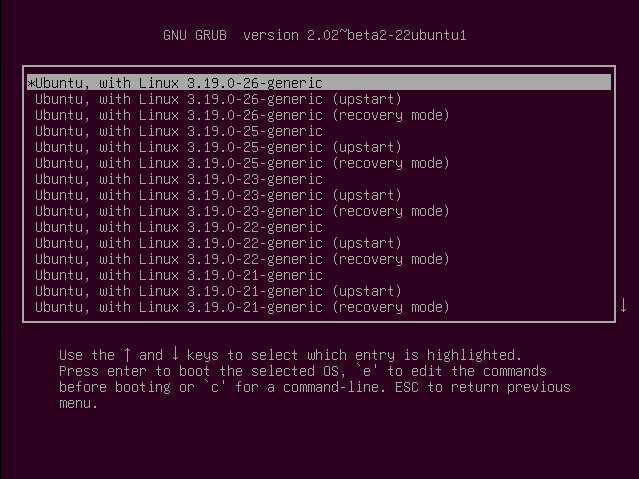
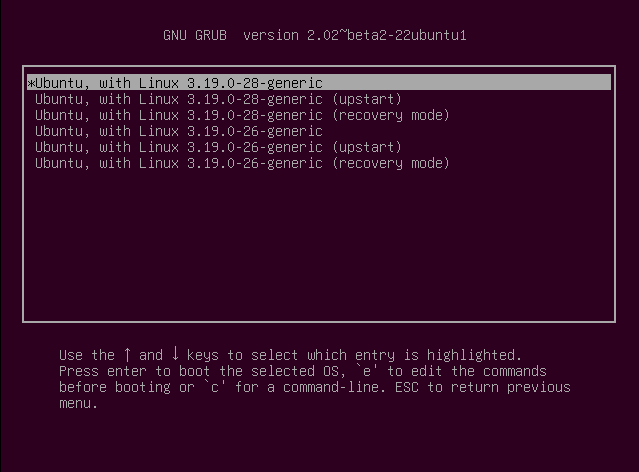
GRUB boot manager maintains GRUB entries for each old kernel, in case you want to boot into it.
As part of disk cleaning, you can consider removing old kernel images if you haven't used them for a while.
How to Clean up Old Kernel Images with apt-get
Before you remove old kernel images, remember that it is recommended to keep at least two kernel images (the latest one and an extra older version), in case the primary one goes wrong. That said, let's see how to uninstall old kernel images on Ubuntu platform.
In Ubuntu, kernel images consist of the following packages.
- linux-image-<VERSION-NUMBER>: kernel image
- linux-image-extra-<VERSION-NUMBER>: extra kernel modules
- linux-headers-<VERSION-NUMBER>: kernel header files
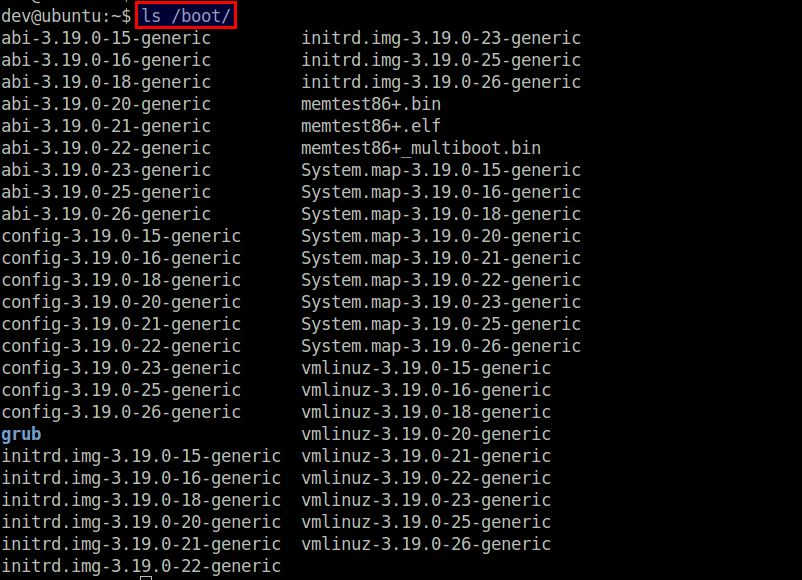
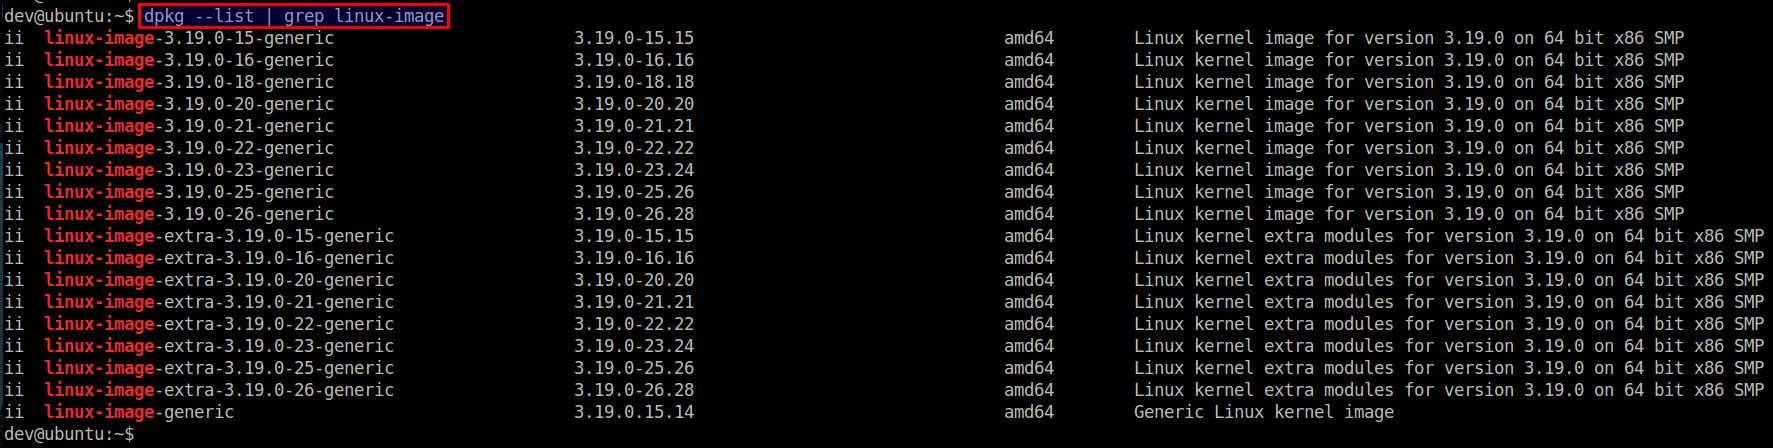
First, check what kernel image(s) are installed on your system.
$ dpkg --list | grep linux-image
$ dpkg --list | grep linux-headers
Among the listed kernel images, you can remove a particular version (e.g., 3.19.0-15) as follows.
$ sudo apt-get purge linux-image-3.19.0-15
$ sudo apt-get purge linux-headers-3.19.0-15
The above commands will remove the kernel image, and its associated kernel modules and header files.
Note that removing an old kernel will automatically trigger the installation of the latest Linux kernel image if you haven't upgraded to it yet. Also, after the old kernel is removed, GRUB configuration will automatically be updated to remove the corresponding GRUB entry from GRUB menu.
If you have many unused kernels, you can remove multiple of them in one shot using the following shell expansion syntax. Note that this brace expansion will work only for bash or any compatible shells.
$ sudo apt-get purge linux-image-3.19.0-{18,20,21,25}
$ sudo apt-get purge linux-headers-3.19.0-{18,20,21,25}
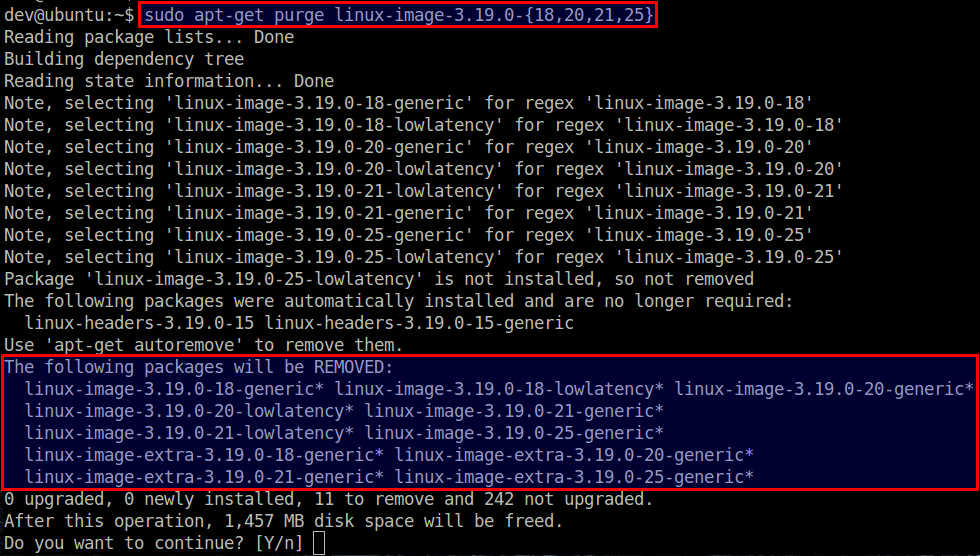
The above command will remove 4 kernel images: 3.19.0-18, 3.19.0-20, 3.19.0-21 and 3.19.0-25.
If GRUB configuration is not properly updated for whatever reason after old kernels are removed, you can try to update GRUB configuration manually with update-grub2 command.
$ sudo update-grub2
Now reboot and verify that your GRUB menu has been properly cleaned up.
How to Clean up Old Kernel Images with purge-old-kernels
Another, more user-friendly, way to remove old kernels is via a command-line tool called purge-old-kernels. This tool is a part of bikeshed package, which is a random collection of useful tools.
$ sudo apt-get install bikeshed
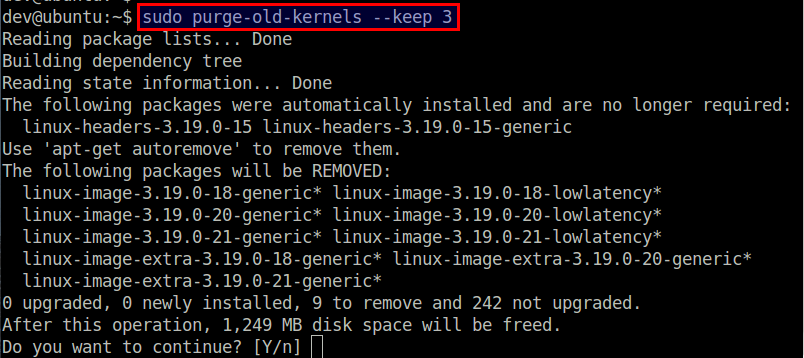
Using purge-old-kernels, you can remove a configurable number of old kernel images and header files. For example, to remove all kernel images (along with their header files) except for the latest 3 kernels, run this:
$ sudo purge-old-kernels --keep 3
Support Xmodulo
This website is made possible by minimal ads and your gracious donation via PayPal or credit card
Please note that this article is published by Xmodulo.com under a Creative Commons Attribution-ShareAlike 3.0 Unported License. If you would like to use the whole or any part of this article, you need to cite this web page at Xmodulo.com as the original source.

Xmodulo © 2021 ‒ About ‒ Write for Us ‒ Feed ‒ Powered by DigitalOcean