How to use Mutt email client with encrypted passwords
Last updated on September 6, 2020 by Dan Nanni
Mutt is an open-source email client written for Linux/UNIX terminal environment. Together with alpine, Mutt has the most devoted followers among Linux command-line enthusiasts, and for good reasons. Think of anything you expect from an email client, and Mutt has it: multi-protocol support (e.g., POP3, IMAP and SMTP), S/MIME and PGP/GPG integration, threaded conversation, color coding, customizable macros/keybindings, and so on. Besides, terminal-based Mutt is a lightweight alternative for accessing emails compared to bulky web browser-based (e.g., Gmail, Ymail) or GUI-based email clients (e.g., Thunderbird, MS Outlook).
When you want to use Mutt to access or send emails via corporate SMTP/IMAP servers or replace web mail services, one concern you may have is how to protect your email credentials (e.g., SMTP/IMAP passwords) stored in a plain-text Mutt configuration file (~/.muttrc).
For those who are security-conscious, there is actually an easy way to encrypt Mutt configuration to prevent such risk. In this tutorial, I describe how you can encrypt sensitive Mutt configuration such as SMTP/IMAP passwords using GnuPG (GPG), an open-source implementation of OpenPGP.
Step One (Optional): Create GPG Key
Since we are going to use GPG to encrypt Mutt configuration, the first step is to create a GPG key (public/private keypair) if you don't have one. If you do, skip this step.
To create a new GPG key, type the following.
$ gpg --gen-key
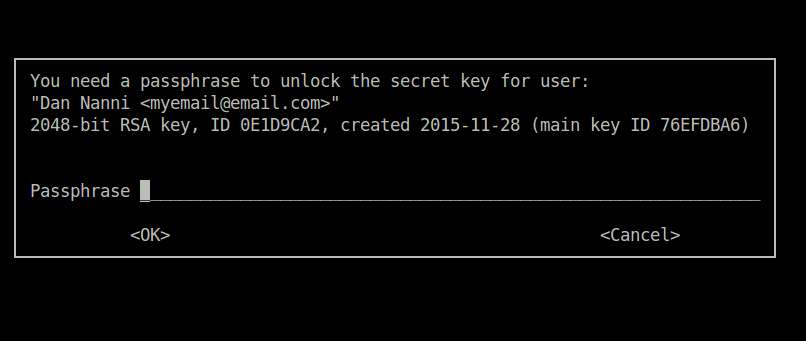
Choose the key type (RSA), keysize (2048 bits), and expiration date (0: no expiration). When prompted for a user ID, type your name (Dan Nanni) and email address ([email protected]) to be associated with the private/public keypair. Finally, type a passphrase to protect your private key.
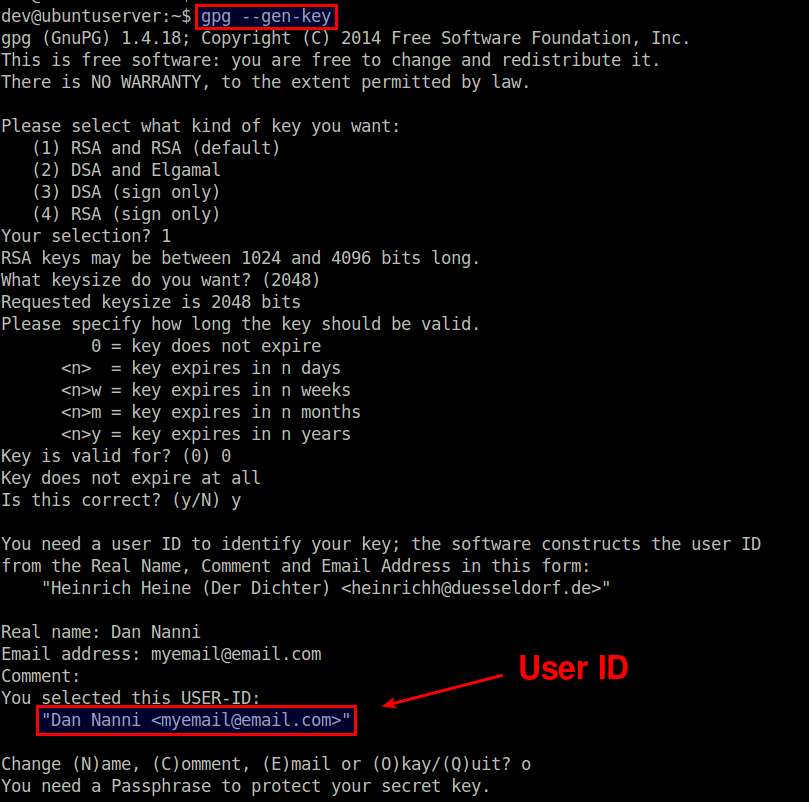
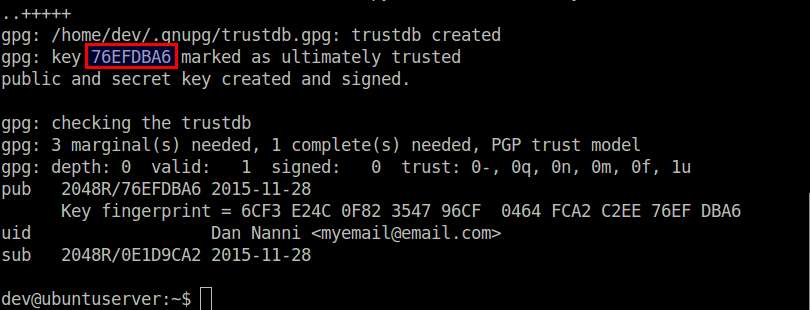
Generating a GPG key requires a lot of random bytes for entropy, so make sure to perform some random actions on your system (e.g., type on a keyboard, move a mouse or read/write a disk) during key generation. Depending on keysize, it may take a few minutes or more to generate a GPG key.
Step Two: Encrypt Sensitive Mutt Configuration
Next, create a new text file in ~/.mutt directory, and put in the file any sensitive Mutt configuration you want to hide. In this example, I specify SMTP/IMAP passwords.
$ mkdir ~/.mutt
$ vi ~/.mutt/password
set smtp_pass="XXXXXXX"
set imap_pass="XXXXXXX"
Now encrypt this file with gpg using your public key as follows.
$ gpg -r [email protected] -e ~/.mutt/password
This will create ~/.mutt/password.gpg, which is a GPG-encrypted version of the original file.
Go ahead and remove ~/.mutt/password, leaving only the GPG-encrypted version.
Step Three: Create Full Mutt Configuration
Now that you have encrypted sensitive Mutt configuration in a separate file, you can specify the rest of your Mutt configuration in ~/.muttrc. Then add the following line at the end of ~/.muttrc.
source "gpg -d ~/.mutt/password.gpg |"
This line will decrypt ~/.mutt/password.gpg when you launch Mutt, and apply the decrypted content to your Mutt configuration.
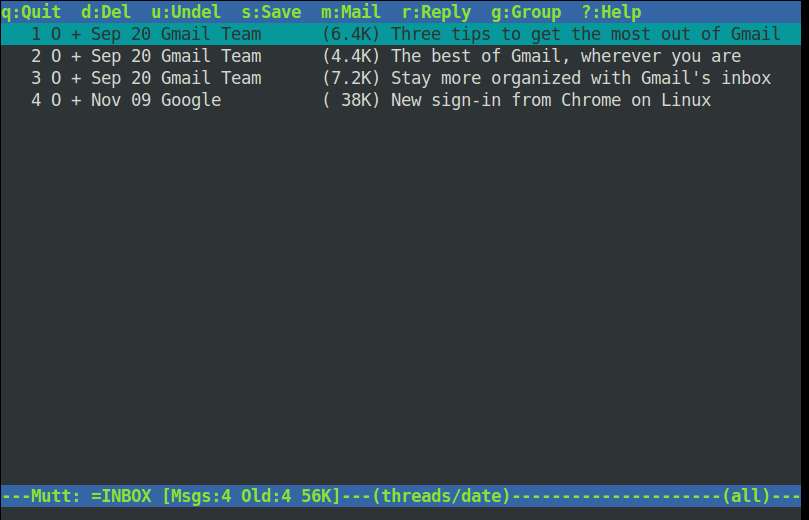
The following shows an example of full Mutt configuration which allows you to access Gmail with Mutt, without revealing your SMTP/IMAP passwords. Replace yourgmailaccount with your Gmail ID. Also, you need to enable access for less secure apps in your Google account settings.
set from = "[email protected]"
set realname = "Your Name"
set smtp_url = "smtp://[email protected]:587/"
set imap_user = "[email protected]"
set folder = "imaps://imap.gmail.com:993"
set spoolfile = "+INBOX"
set postponed = "+[Google Mail]/Drafts"
set trash = "+[Google Mail]/Trash"
set header_cache =~/.mutt/cache/headers
set message_cachedir =~/.mutt/cache/bodies
set certificate_file =~/.mutt/certificates
set move = no
set imap_keepalive = 900

# encrypted IMAP/SMTP passwords
source "gpg -d ~/.mutt/password.gpg |"
Step Four (Optional): Configure gpg-agent
At this point, you will be able to use Mutt with encrypted IMAP/SMTP passwords. However, every time you launch Mutt, you will first be prompted to enter a GPG passphrase in order to decrypt IMAP/SMTP passwords using your private key.
If you want to avoid such GPG passphrase prompts, you can set up gpg-agent. Running as a daemon, gpg-agent securely caches your GPG passphrase, so that gpg automatically obtains your GPG passphrase from gpg-agent without you typing it manually. If you are using Linux desktop, you can use desktop-specific ways to configure something equivalent to gpg-agent, for example, Seahorse for GNOME desktop and Kleopatra for KDE desktop.
You can install gpg-agent on Debian-based systems with:
$ sudo apt-get install gnupg-agent
gpg-agent comes pre-installed on Red Hat based systems.
Now add the following to your .bashrc file.
envfile="$HOME/.gnupg/gpg-agent.env"
if [[ -e "$envfile" ]] && kill -0 $(grep GPG_AGENT_INFO "$envfile" | cut -d: -f 2) 2>/dev/null; then
    eval "$(cat "$envfile")"
else
    eval "$(gpg-agent --daemon --allow-preset-passphrase --write-env-file "$envfile")"
fi
export GPG_AGENT_INFO
Reload .bashrc, or simply log out and log back in.
$ source ~/.bashrc
Now confirm that GPG_AGENT_INFO environment variable is set properly.
$ echo $GPG_AGENT_INFO
/tmp/gpg-0SKJw8/S.gpg-agent:942:1
Also, when you type gpg-agent command, you should see the following message.
$ gpg-agent
gpg-agent: gpg-agent running and available
Once gpg-agent is up and running, it will cache your GPG passphrase the first time you type it at the passphrase prompt. Subsequently when you launch Mutt multiple times, you won't be prompted for a GPG passphrase (as long as gpg-agent is up and the cache entry does not expire).
Conclusion
In this tutorial, I presented a way to encrypt sensitive Mutt configuration such as SMTP/IMAP passwords using GnuPG. Note that if you want to use GnuPG within Mutt to encrypt or sign your email message, you can refer to the official guide on using GPG with Mutt.
If you know of any security tips for using Mutt, feel free to share it.
Support Xmodulo
This website is made possible by minimal ads and your gracious donation via PayPal or credit card
Please note that this article is published by Xmodulo.com under a Creative Commons Attribution-ShareAlike 3.0 Unported License. If you would like to use the whole or any part of this article, you need to cite this web page at Xmodulo.com as the original source.

Xmodulo © 2021 ‒ About ‒ Write for Us ‒ Feed ‒ Powered by DigitalOcean