How to conduct security vulnerability assessment of a remote server with OpenVAS
Last updated on July 22, 2020 by Dan Nanni
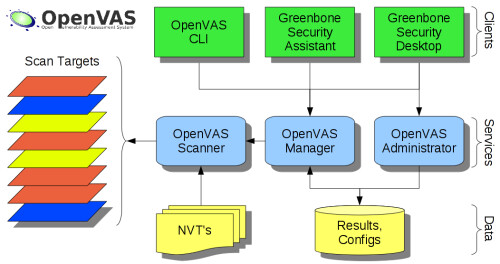
OpenVAS is an open-source framework consisting of a suite of tools for vulnerability scanning and management. OpenVAS is freely available on multiple platforms, and licensed under the GPL.
In this article, I present an OpenVAS tutorial where I show how to conduct security vulnerability assessment of a remote server with OpenVAS. You can install OpenVAS from the source code or Linux packages. If you want, you can also run OpenVAS as a virtual appliance. In this tutorial, I set up OpenVAS as a virtual appliance running on VirtualBox.
Set up OpenVAS Virtual Appliance
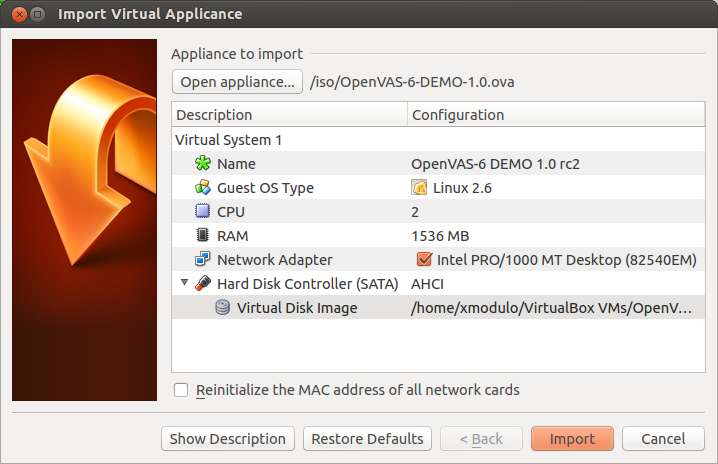
First, download OpenVAS OVA image. Launch VirtualBox, and choose "Import Appliance" to import the OVA image. Choose "Bridge Adapter" and have it attached to the network where scan targets are connected. Here I assume that the target server to be examined with OpenVAS is reachable via the same bridged network.
Power on OpenVAS appliance. Once you see the console screen, log in as root using a default root password root.
It is recommended that you upgrade the base Debian system immediately to install all the latest security updates. To do so, run:
# apt-get dist-upgrade
# apt-get upgrade
Next, remove a pre-installed encryption key, and generate a fresh new key, which will be used to encrypt authenticated scan results and other credential information.
# gpg --homedir=/usr/local/etc/openvas/gnupg --delete-secret-keys 94094F5B
# gpg --homedir=/usr/local/etc/openvas/gnupg --delete-keys 94094F5B
# openvasmd --create-credentials-encryption-key
Note that the above key generation process can take a considerable amount of time (up to 60 minutes). After that, restart OpenVAS manager.
# /etc/init.d/openvas-manager restart
OpenVAS comes with a web client called Greenbone Security Assistant. This web client provides a convenient web-based interface for the full feature set of OpenVAS.
Access OpenVAS Administrative Web Interface
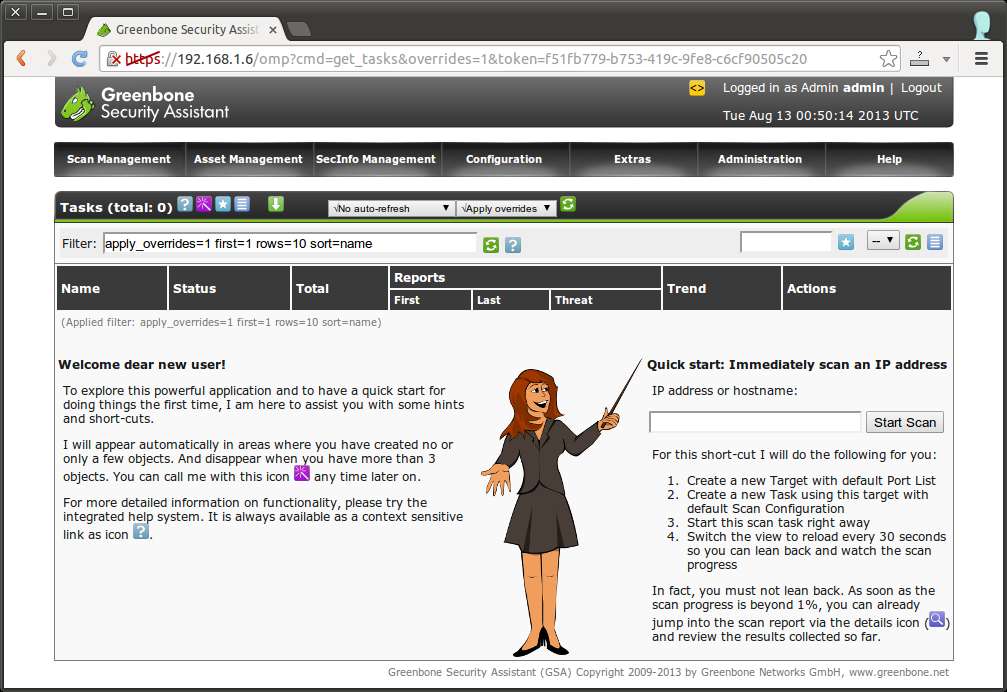
To access the web interface of OpenVAS, go to https://<ip-address-openvas-appliance>. OpenVAS uses a self-signed SSL certificate. So accept an exception in your browser during the first-time access. Log in with a pre-configured administrative OpenVAS account (login: admin, password: admin). You will see the main window of OpenVAS as shown below.
Configure a Scan Target
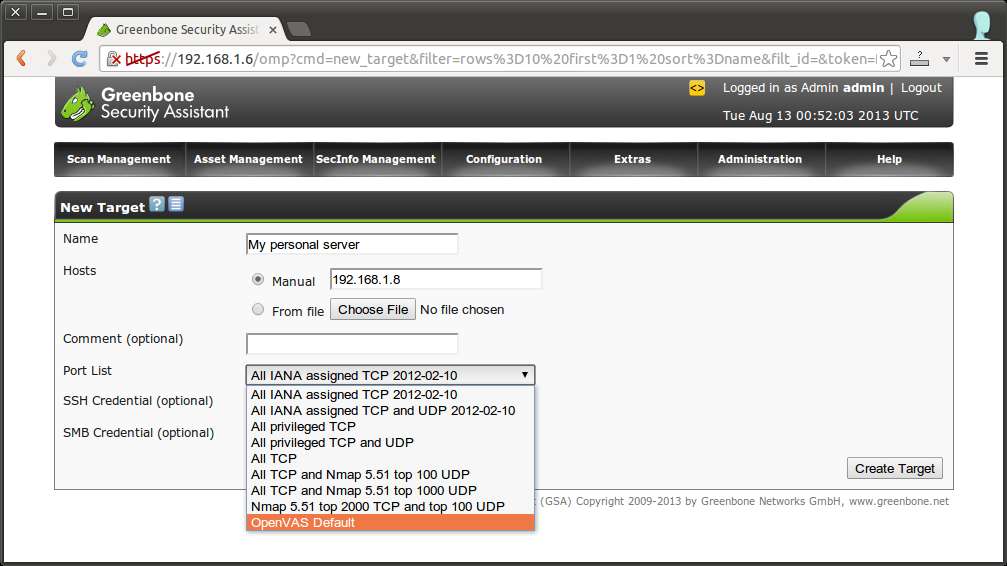
The first thing you can do is to configure a scan target (i.e., a remote host to scan). To do so, go to Configuration → Targets menu. Click on star icon to add a new target.
Choose manual and fill in the IP address of a remote host. Choose a port list from the drop down list. If you are done, click on "Create Target" button.
Configure and Start a Scan
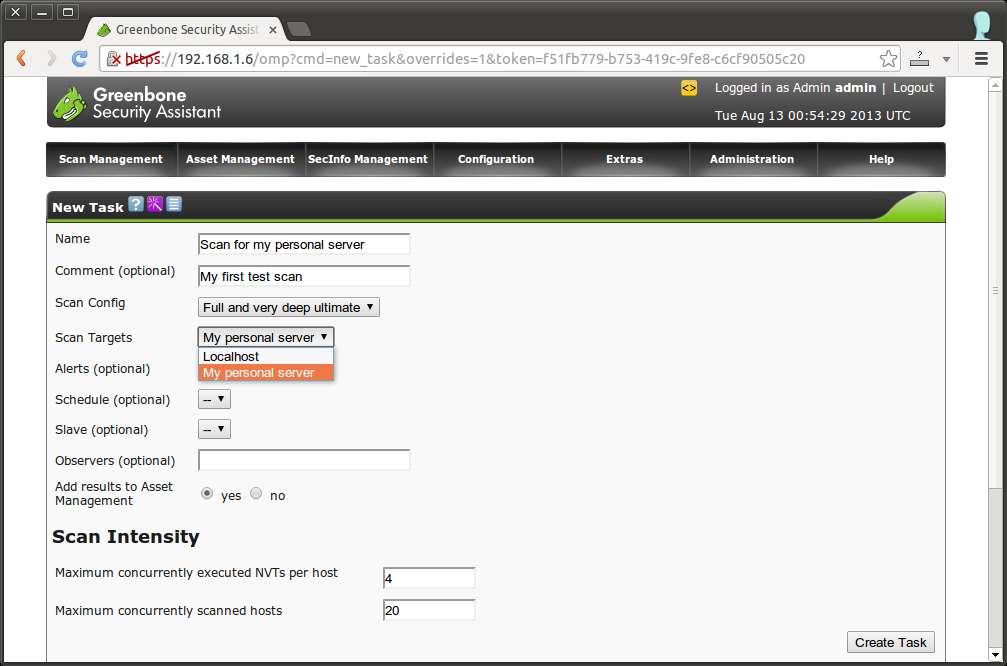
Next, create a new task which will perform scanning. To do so, click on "Scan Management" → "New Task" menu. Fill in name for a new scan. Choose "Scan Config" among available configs. A scan config determines a list of vulnerability tests to conduct. As you can see later, you can create and customize scan configs as you wish. For "Scan Target", choose the target that you just created. Once done, click on "Create Task" button.
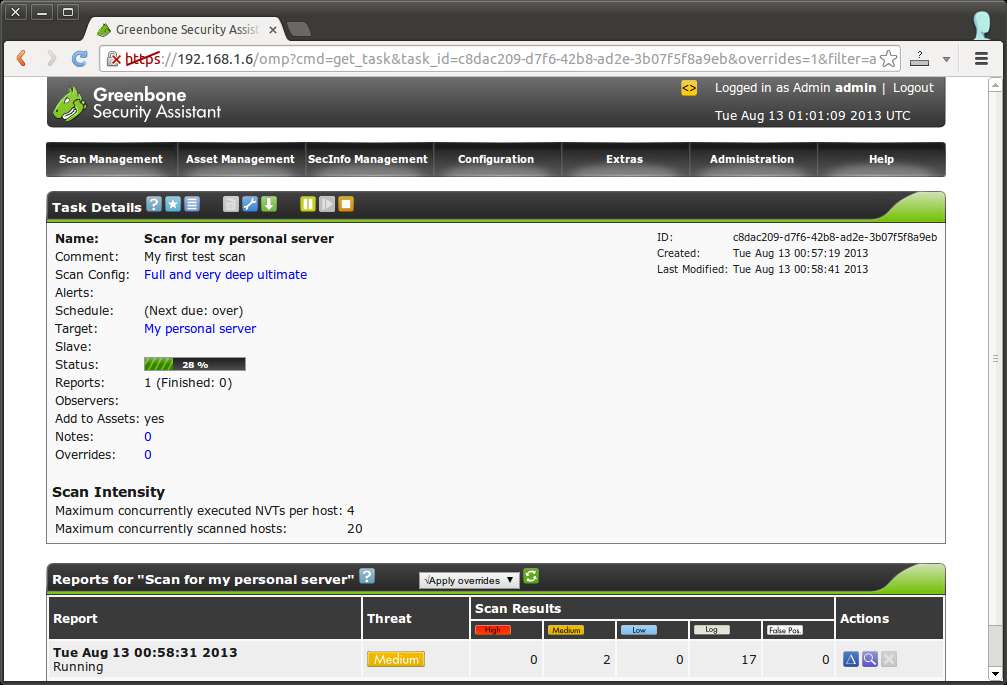
Once the task has been created, click on Play button under Actions field to actually start scanning the target. You can check scan progress in the task details page.
Check Vulnerability Scan Reports
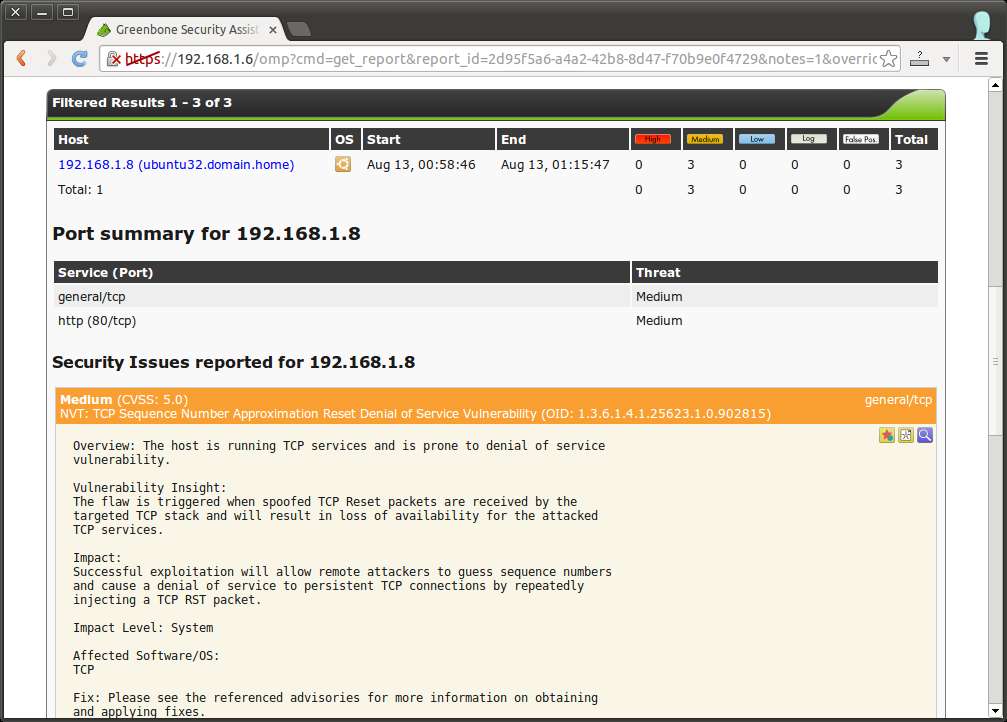
After scan is completed, you can check the summary of scan results, by clicking on magnifier icon under Actions field.
Scan results are classified into High, Medium and Low risks, and also contain detailed logs. For each security issue discovered, the report summarizes exploited vulnerabilities, their impacts, affected software/OS, and references to suggested fixes. The following is the screenshot of a sample scan report.
If you want, you can export a scan report to a downloadable document. OpenVAS supports exporting a scan report to multiple formats including PDF, TXT, HTML and XML.
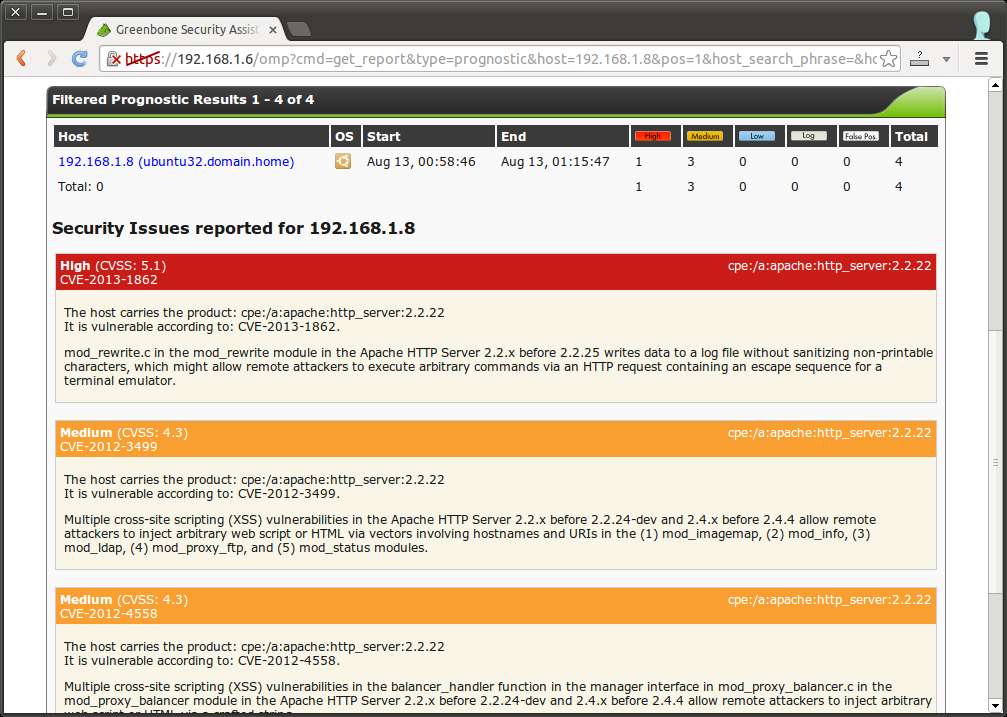
You can also check the detailed "prognostic" report of each scan target, by going to "Asset Management" → Hosts menu. Click on "Prognostic Report" icon for the target that you want to examine. While a scan report above presents the results of a particular scan run, a prognostic report details the aggregated results of all previous scans for a particular host. A typical prognostic report looks like the following.
Customize Vulnerability Scan
OpenVAS allows you to create or customize scan configs as you wish. To access existing scan configs, go to Configuration → "Scan Configs". A given scan config contains a list of Network Vulnerability Tests (NVTs) to be conducted. To customize the current scan config, you can export it to XML, and re-import it after modification.

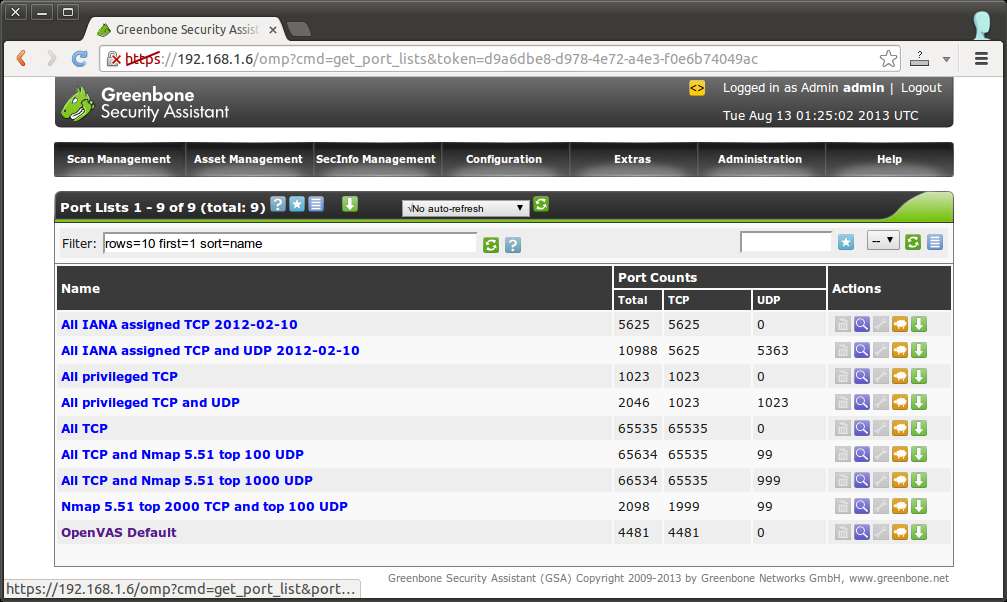
Besides vulnerability tests, you can also customize a list of ports to scan. To do so, go to Configuration → "Port Lists".
Download Up-to-date Vulnerability Test Suites
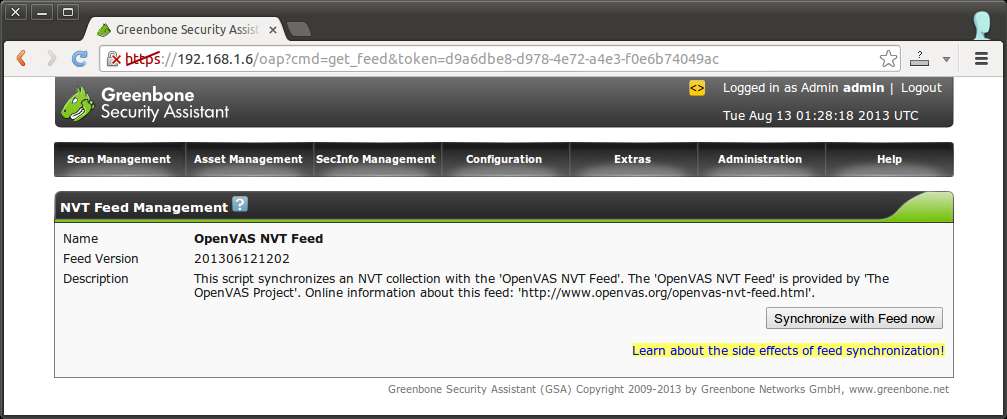
No vulnerability scanning tool would be really useful without up-to-date vulnerability test suites. OpenVAS project maintains public feeds of Network Vulnerability Tests (NVTs), Security Content Automation Protocol (SCAP), CERT advisory. You can sync up with the latest feeds, simply by going to Administration and synchronizing with them.
Conclusion
As you can see, OpenVAS is a powerful and yet user-friendly all-in-one vulnerability scanning tool. It can automate a variety of vulnerability tests against target machines based on known vulnerabilities or exploits, thereby providing valuable security insights on the target systems. If you are interested, check out other similar scanning tools like lynis, LMD or rkhunter.
Support Xmodulo
This website is made possible by minimal ads and your gracious donation via PayPal or credit card
Please note that this article is published by Xmodulo.com under a Creative Commons Attribution-ShareAlike 3.0 Unported License. If you would like to use the whole or any part of this article, you need to cite this web page at Xmodulo.com as the original source.

Xmodulo © 2021 ‒ About ‒ Write for Us ‒ Feed ‒ Powered by DigitalOcean